
I was pretty compulsive and went out and bought a new color for the walls by just picking one I thought would look good - I wouldn’t recommend ever doing this - but just this one time, it worked out! Painting made a HUGE difference. I already liked the room better and the color set the tone for the rest of the room. After adding our furniture and rearranging 10 million times, we settled on the set up of the room.
Then, the fun part. We got our DIY on:
The Shutter Table:
The entrance to our house needed some kind of console table, so instead of going out and buying one - we decided to brainstorm a fun way to make our own. During a quick trip to the Habitat Restore, we found our inspiration. We bought a set of 2 shutters already painted a great color blue for $15. After that we headed to Lowe’s and bought the rest of the materials:
-4 spindles (the vertical things on stairs :) super cheap, $1.50 each!)
-1” x 2” x 8’ batting (4 pieces)
-sand paper
-wood stain
-wood glue
-nails
Then Ben went to work on the actual building and here's how he did it:
Cut the batting into 4 6ft long pieces (This was the length of our shutter, make sure to cut the batting to match the size of yours. In other words, the width and length of your shutter will determine the dimensions you use to cut the batting). Hold on to the 4 2ft. long off cuts - these will be used for the frame of the base along with your 6ft pieces.
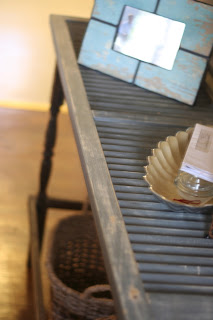
Make the base of the table by nailing and gluing the batting to form 2 identical rectangles using 2 6ft pieces and 2 2ft. pieces for each. Then, nail and glue 1 spindle inside each corner, to the batting, at the top and the bottom. Sand all the edges and stain the base whatever color you choose. We chose to sand it again for a distressed look to the stain. Next, nail the shutter to the top of the base.

And there you have it!


Make the base of the table by nailing and gluing the batting to form 2 identical rectangles using 2 6ft pieces and 2 2ft. pieces for each. Then, nail and glue 1 spindle inside each corner, to the batting, at the top and the bottom. Sand all the edges and stain the base whatever color you choose. We chose to sand it again for a distressed look to the stain. Next, nail the shutter to the top of the base.

No comments:
Post a Comment